


I recently built a project that required integrating with Paypal to collect payments from users. After spending hours trying to implement Paypal payments using the Paypal JavaScript SDK, I realized that this was going to be a uphill task. Thankfully, I found an NPM package that already abstracted the SDK into React components for us to use. In this article, I’ll show you exactly how to collect payments using Paypal in your React application.
Getting started - setup your Paypal account
First steps first. Head over to paypal to create an account. Once done, head to the paypal developer screen.
Getting your credentials
Next step is to grab your credentials i.e your clientId.
Navigate to Dashboard > My Apps & Credentials .

Click the Sandbox tab. Then click the on the Default Application link. It will bring you to a page containing your clientId.

Your sandbox account will be an email address that you can use to make test payments while your client ID is what Paypal uses to connect your Application to your paypal account.
Setup your react project
For this example, our React project will be built using NextJS.
If you’ll like to follow along, you can skip the next couple of steps by simply cloning my repo. Run the git clone git@github.com:onedebos/nextjs-paypal-example.git command to do so. Then checkout to the starter branch with git checkout starter . If you clone the starter repo, you can skip to the Setup project structure section.
Otherwise, here are the steps to follow.
We’ll be using one of the NextJS example projects with tailwindcss already configured.
Run the command yarn create next-app --example with-tailwindcss next-paypal-example to create a NextJS application with Tailwindcss already configured.
Setup Project Structure
We’ll create a new folder in our current project called utils. Inside our utils folder, we’ll create a constants folder. Within the constants folder, add an index.js file.
Your folder structure should now look like
/utils/constants/index.js
Install the Paypal package
Install the react paypal package using yarn add @paypal/react-paypal-js
Collect Payments
Time to start collecting Payments!
In your utils/constants/index.js file, add your clientId.
export const PAYPAL_CLIENT_ID = {
    clientId: 'ATVzbN_TdDnGGVfyPxu6J-5ddFftdqu8l6tFpIy5TEZ7hjbx7y9Q4TY0ICI0Pot2dBBABc-myxZgYOfj'
}
In your _app.js file, bring in the PayPalScriptProvider using import { PayPalScriptProvider } from "@paypal/react-paypal-js";.
Then, wrap your Components with that tag.
import { PayPalScriptProvider } from "@paypal/react-paypal-js";
    import {PAYPAL_CLIENT_ID} from '../utils/constants'
    function MyApp({ Component, pageProps }) {
      return(
        <PayPalScriptProvider options= {{"client-id": PAYPAL_CLIENT_ID.clientId }}>
            <Component {...pageProps} />
        </PayPalScriptProvider>
      )
    }
    export default MyApp
Next, head into pages/index.js to create the page that collects the payments and bring in the PayPal Button.
Let’s create some state to hold data.
      const [succeeded, setSucceeded] = useState(false);
      const [paypalErrorMessage, setPaypalErrorMessage] = useState("");
      const [orderID, setOrderID] = useState(false);
      const [billingDetails, setBillingDetails] = useState("");
The orderId is the most important piece of state we care about. When the user clicks the Pay with PayPal button, Paypal will generate an orderId for the order and return that back to us. In the createOrder function below, we can see this in action.
      // creates a paypal order
      const createOrder = (data, actions) => {
        return actions.order
          .create({
            purchase_units: [
              {
                amount: {
                  // charge users $499 per order
                  value: 499,
                },
              },
            ],
            // remove the applicaiton_context object if you need your users to add a shipping address
            application_context: {
              shipping_preference: "NO_SHIPPING",
            },
          })
          .then((orderID) => {
            setOrderID(orderID);
            return orderID;
          });
      };
Along with the createOrder function, we need another function that runs when the payment is approved - onApprove
      // handles when a payment is confirmed for paypal
      const onApprove = (data, actions) => {
        return actions.order.capture().then(function (details) {
          const {payer} = details;
          setBillingDetails(payer);
          setSucceeded(true);
        }).catch(err=> setPaypalErrorMessage("Something went wrong."));
      };
Lastly, we can plugin out PayPal button from our react-paypal-js package to handle the payments.
        <PayPalButtons
                style={{
                  color: "blue",
                  shape: "pill",
                  label: "pay",
                  tagline: false,
                  layout: "horizontal",
                }}
                createOrder={createOrder}
                onApprove={onApprove}
        />
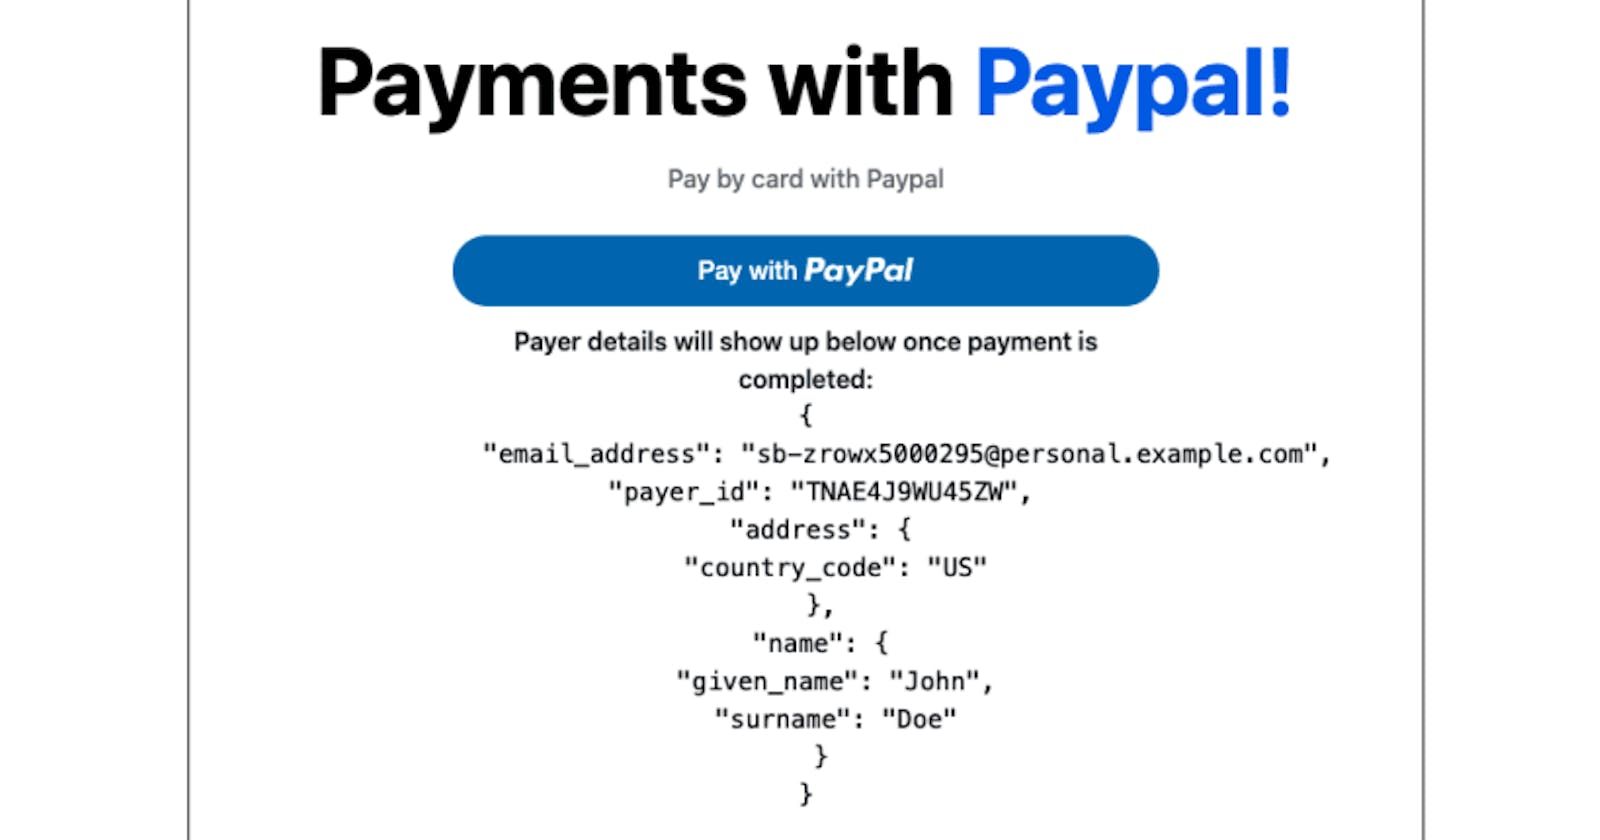
Paypal will redirect the user to a new window to complete the payment.

You can test this out using the sandbox email provided on the Paypal developer dashboard.
The full repo for the code is here.